Translations:Налаштування Webhook/5/en: відмінності між версіями
Перейти до навігації
Перейти до пошуку
(Створена сторінка: 3. In the "Name" field, enter the name of the event or an identifier to understand the events<br> 4. In the "Service address" field, enter the "URL" of the service ("Contact the sysadmin")<br> 5. Select the required counterparty in the table and set the event flags required for display (''For example Guest - addition, change'')<br> 6. Click '''Add'''', after which the active Webhook will be displayed on the left side of the page '''"Quick Reaction Guide"''...) |
Немає опису редагування |
||
| Рядок 2: | Рядок 2: | ||
4. In the "Service address" field, enter the "URL" of the service ("Contact the sysadmin")<br> | 4. In the "Service address" field, enter the "URL" of the service ("Contact the sysadmin")<br> | ||
5. Select the required counterparty in the table and set the event flags required for display (''For example Guest - addition, change'')<br> | 5. Select the required counterparty in the table and set the event flags required for display (''For example Guest - addition, change'')<br> | ||
6. Click '''Add'''', after which the active Webhook will be displayed on the left side of the page '''" | 6. Click '''Add'''', after which the active Webhook will be displayed on the left side of the page '''"Directory of quick reactions"'''<br> | ||
[[File:Webhook screenshot 2.png|1200px|bordered]] | [[File:Webhook screenshot 2.png|1200px|bordered]] | ||
Поточна версія на 07:51, 30 червня 2023
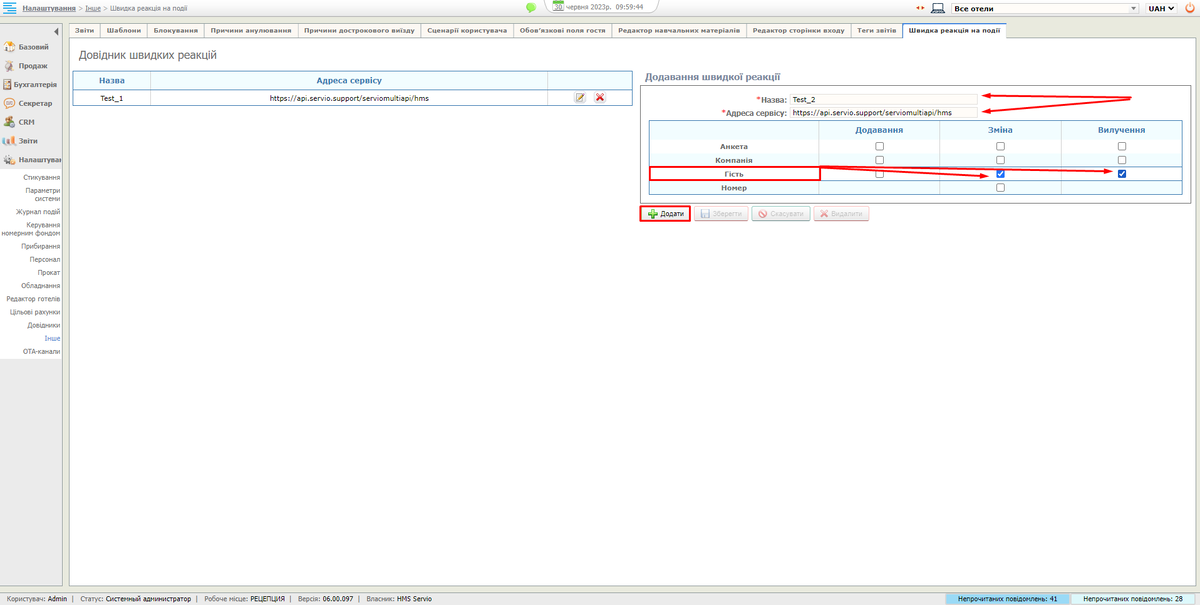
3. In the "Name" field, enter the name of the event or an identifier to understand the events
4. In the "Service address" field, enter the "URL" of the service ("Contact the sysadmin")
5. Select the required counterparty in the table and set the event flags required for display (For example Guest - addition, change)
6. Click Add', after which the active Webhook will be displayed on the left side of the page "Directory of quick reactions"
